
How to stop TTS trolls on your stream.
October 30, 2026
TTS.fish is our product; the settings below work on any TTS tool, and we note where each one lives on ours.
Text-to-speech is the fastest way to make chat feel like it’s in the room with you. It’s also the fastest way to get a slur read out live on your channel, and platforms hold you responsible for what plays on your stream. Twitch’s guidelines FAQ, for example, tells streamers to mute unmoderated TTS when they step away. Every streamer who runs TTS for long enough ends up building the same defenses. Here they are.
1. Approve messages before they play
An approval queue is the strongest protection there is: nothing is read out on stream before you’ve seen it. On TTS.fish this is the default. Every message waits on your Playback page until you approve it, unless you turn on auto-approve. Reject or skip a message and the hold on the viewer’s card is released, so they aren’t charged. Messages you don’t review within 24 hours are rejected automatically.
2. Put a price on every message
Free TTS invites spam because it costs nothing to send. A price per message changes the math for trolls: every message that gets read out costs them money, and you get paid for each one. Pick a base price that feels like a real decision (TTS.fish prices start at $1), then add price tiers so a wall of text costs more than a quick shoutout.
3. Block words and phrases
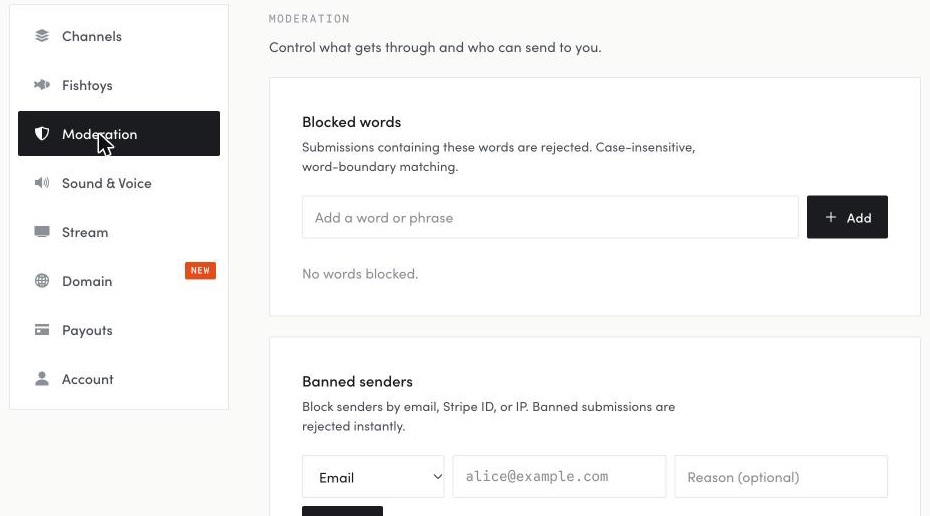
Keep a blocklist of words and phrases you never want read out: slurs, your real name, your address, anything that has been used against you before. On TTS.fish, a blocked message is refused before the viewer can pay. Matching is by whole word or phrase and ignores capitalization, so add the common misspellings too, and add to the list after every stream where something slipped through.
4. Add a cooldown between messages
If you turn on auto-approve during a busy stream, set a cooldown. A few seconds of silence between messages stops a flood from taking over the stream and gives you time to react before the next one plays. One thing to know: switching auto-approve on from the Playback page approves everything already waiting, so clear your queue first.
5. Gate the voices that get abused
Some voices are funnier, louder, or easier to abuse than others. Put those behind a higher price instead of offering every voice at the same rate. On TTS.fish each channel has its own price, length limit, and list of allowed voices. Put premium voices on a separate, higher-priced channel and untick them on your main one, so they can only be picked at the higher price.
6. Cap message length
Long messages are where trolls hide the bad part. A tight character limit keeps messages readable at a glance, which matters most when you’re approving them live.
7. Ban repeat offenders
When someone keeps testing your limits, ban them. On TTS.fish you can ban a sender straight from your approval queue, or from Settings. And when a viewer files a chargeback, the email address and saved payment profile behind it are blocked from paying any streamer on TTS.fish.
A setup that works for most streams
- A base price high enough that sending a message is a choice.
- A blocklist, including misspellings, that you add to after every incident.
- Approval on while you’re new to TTS or the chat is hostile.
- Auto-approve with a cooldown once you trust your audience.
- Premium voices on a separate, higher-priced channel.
Where these settings live on TTS.fish
Prices, price tiers, length limits, voices, and auto-approve are under Settings > Channels. The blocklist and ban list are under Settings > Moderation. The cooldown, the auto-approve switch, and Approve, Reject, and Ban for each message are on your Playback page. The docs explain how each one works. Setting up for the first time? See the guides for Kick, Twitch, and OBS.